Okay, I'm pretty comfortable with technology. But I am having the WORST time trying to figure out how to post a PDF! I know about web hosting sites, but I'm not willing to pay for premium memberships, and others that are free, are a bit dodgy. (KnitTech agrees, and she makes her living as a techie, so I LISTEN to her...)
So here's the plan. I will post the whole tutorial here as a post. (Get yourself a drink, and maybe a meal - it's a long one...)
If you think it would be helpful, and want to try it - drop me a note with your email address and I will send you the PDF.
So here goes...

How to go from the sock on the left to the sock on the right – adding a heel where there isn’t one.
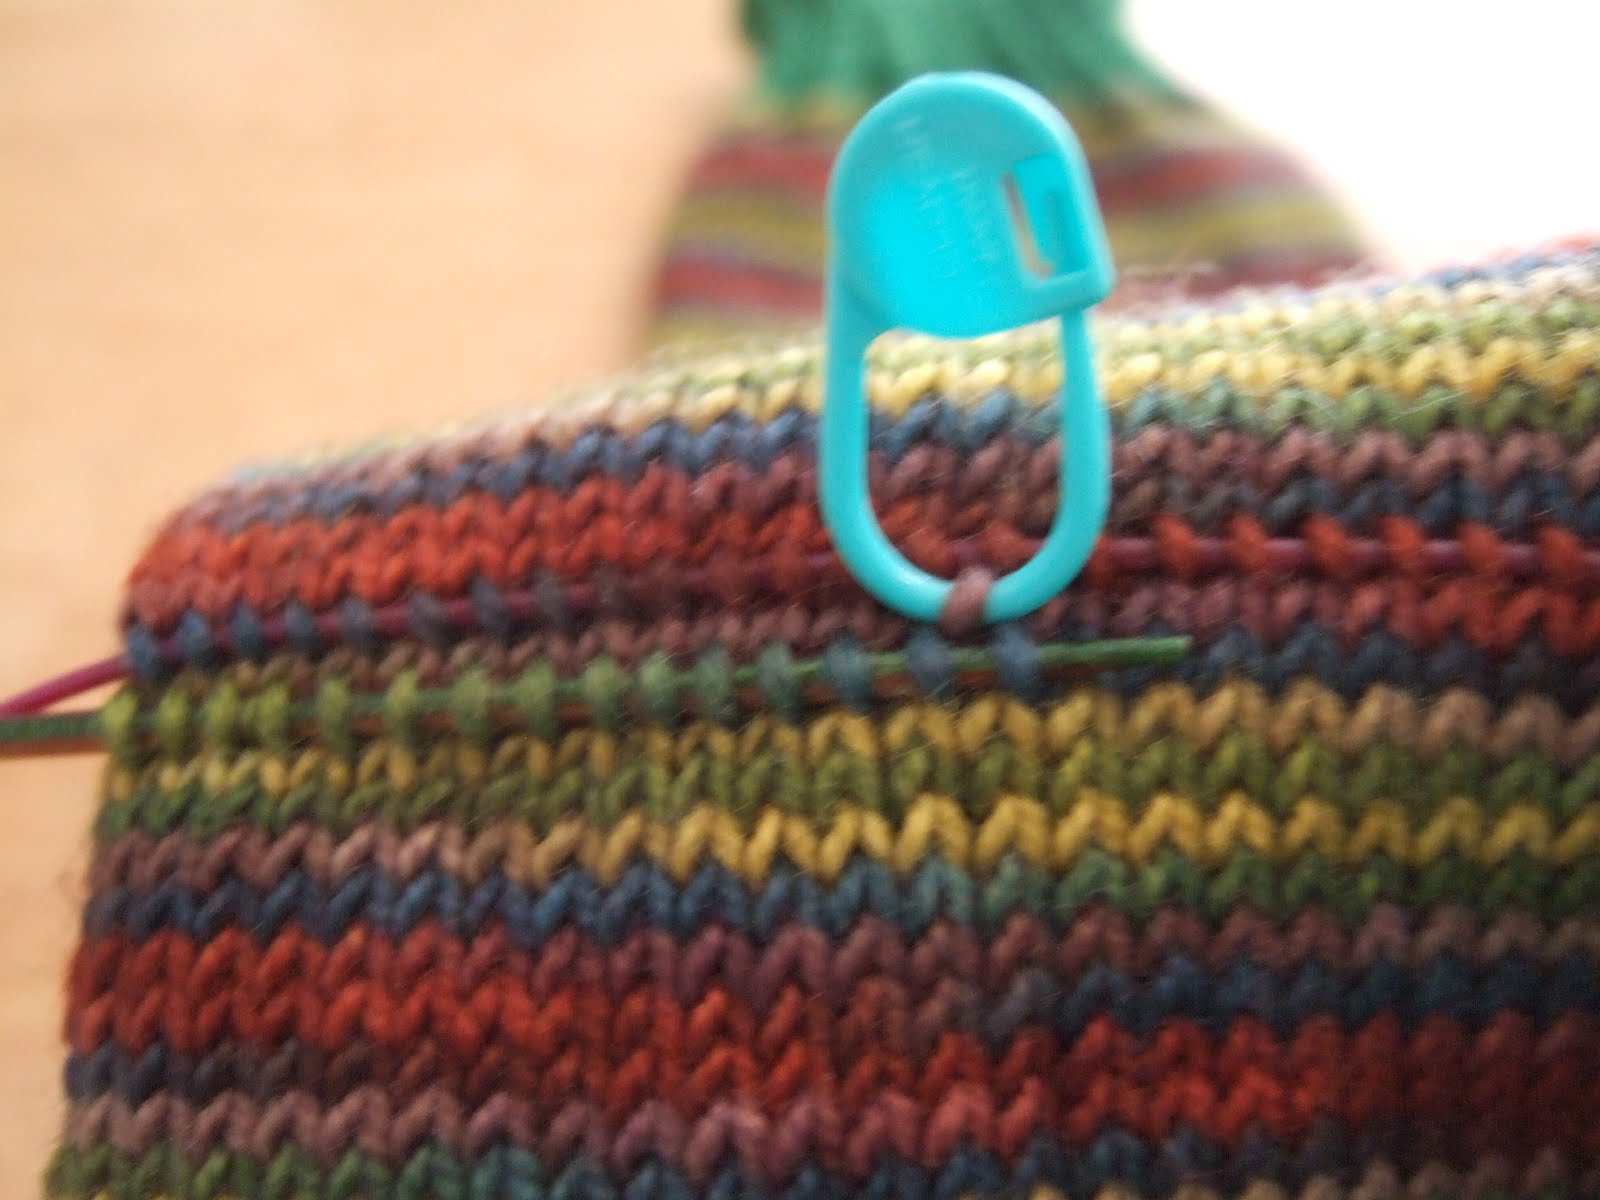
First mark where you want the heel. In most cases, this is about 1.5 to 2 inches LESS than the overall length of your foot from back of heel to tip of toe. Mark this length.
NOTE** be careful to mark the bottom of the foot in relation to the toe – you don’t want the heel coming out the side of the sock!

Once you have this marked, you can start picking up the stitches. I make a 64-stitch sock, so the heel will be worked on 32 stitches. I make sure the 32 stitches are centred over the toe. On the row above where you have marked, start picking up stitches. Make sure you are always picking up the same side of the stitch, I.e. the left or right side doesn’t really matter, as long as you are consistent right across.

Here you see the needle in all the stitches above the marker. ( I use a circular needle – I find the flexible cord very helpful in this).
With a second needle, pick up the same stitches in the row BELOW your marker.

Here you see both cables of the two circular needles with the picked up stitches.

Now comes the scary part. Take your scissors, yes SCISSORS, and CUT a stitch in the middle, between the two cables. If you’ve never cut your knitting before, this may freak you out a bit, but trust me, it won’t be that bad. If you’ve steeked before, this is old hat.

The loose thread of yarn now needs to be unraveled to the ends of the picked up stitches

Go slowly, and you will see with zig zag of the line of stitches you are unravelling. (Here shown in the yellow wool). When you get to the end of the picked up stitches, ensure that the loose thread is clear of the stitches on the needles, but don’t go beyond the needles, or you will have loose stitches, which is bad. Stitches on needles – good. Loose stitches – bad.
At each side of the sock, you will have about 2 inches of wool that will get woven in at the end.

Voila! A hole in your sock, anchored by needles, where your heel will go. (you can see the ends here – they will be woven in at the end.

You will notice that the sides seem to be a bit gappy. If you knit the heel on just the 64 stitches you have picked up, you will have huge holes on each side, so…

… I pick up 4 stitches at each side (2 on each end of each needle). This number is not locked in stone – it’s what works for me and my gauge. If you think 6 stiches would work better, go for it. If your gap isn’t that large, and 2 will fill it, go with 2. 4 is what works for me. I would recommend even numbers however – it’s just easier.

At this point, I start knitting the heel. (On this particular pair, the heels are a different wool – green Koigu that matches the multi coloured STR). I start at one side, and knit one row plain all around. When I get back to the beginning, I start my decreases. My basic construction is K1, K2 tog, knit to last three stitches, K2tog tbl, K1. I do this decrease on EVERY OTHER ROW, and knit plain on the other rows. It’s the same way I make my toes, except I increase every other row, since I make my socks toe-up. If you knit socks top down, and make a standard toe, that’s exactly what you are doing here.

This is the first round complete.

A few rounds in. You can see the decreases starting to form the diagonal line that will run from the ankle to the heel.

More decreases, more diagonal.

Looks like a toe, doesn’t it?

But it’s actually a heel!
I continue decreasing every other round until there are 12 stitches left on each needle. (Again – my arbitrary number. 12 is what seems to work to fit the heel of most of my recipients.) It’s also the number of stitches I start toes on, so it’s easier for me to remember.

Now, all that’s left it to Kitchener stitch the opening closed. I have a handy reminder dog tag that Robyn of Knit and Purl Mama sent me. It’s brilliant, and a great memory jog.

More Kitchener stitch. So close to the end…

Finish by sewing in all ends – there will be 4 – the start and finish of the actual heel, and the two from the unraveled line.

A finished heel!
I find this method really handy when you are knitting socks, and you may not have a recipient in mind. You can place the heel wherever you want to. I tend to knit totally plain stockinette socks. I pattern other parts of my knitting – socks are my go to for non-thinking knitting. I can knit and hold conversations, watch my kid’s baseball or basketball games, basically knit anywhere, and not worry about having to frog. Especially since I knit toe-up – I divide the wool into two equal balls, (love my digital scale for doing this) and knit to the end. (Or almost the end. If you are knitting the heels in the same wool, remember to save at least a walnut sized ball of wool to make the heel.
But here’s another trick (sorry, no pictures of this…) If you know who is getting the socks, and you have their foot measurement, you can avoid the two extra ends and the whole cutting your work thing. When you get to the measurement you want, (again, ensuring you are lined up to the toe placement), simply knit the bottom half of the stitches on to waste yarn (a slippery cotton of around the same or smaller gauge works best. So on my 64 stitch sock, I would knit the bottom 32 stitches on waste yarn. Then (and here’s the trick) put those stiches BACK on your left needle, and knit them again, using your sock wool. What you have done is create a provisional cast on and cast off. When it comes time to pick up your stitches, simply pick up above and below the line of waste yarn, and carefully unpick the waste stitches. Same result (you still need to pick up stitches in the corners), but no ends to sew in.

As you can tell, these are not for me. WHich is really too bad, becasue I love the colours. But my husband has claimed them.
Hope this helps. Since I always like having a sock on the go, this is great for me. But I like plain stockinette socks, and for patterns, this may not always work, unless you keep the underside of the sock plain, and know where you want to break for the heel.
Let me know if you use this, and if it works for you
8 comments:
Excellent photo essay with commentary. I, too, love to have a sock on the go at all times - tv watching, standing in line, talking during lunch...I will definitely keep this in mind and wouldn't mind the pdf...though I am not sure how to let you know...I'll see if I can see an email address for you as I don't want to leave it in the comments. Thanks, j
wow, fabulous tutorial, I totally get it now. I would LOVE the pdf please and thank you !! elizabethtamiso@sbcglobal.net
and with your permission, I will share it with a knitting buddy who is having trouble with heels in socks - this would probably make sense to her as well.
Great tutorial for my favourite heel! It isn't going to be the right heel for every circumstance, but there is a place for this heel in every sock knitters arsenal of heels.
That is a nifty heel. I am such a sucker for seeing increases and decreases in knitting. Kinda like admiring the lines on the rug the vacuum cleaner makes.
These socks are really cute! And, thank you for taking the mystery out of the idea of making a heel after making the sock. The cutting part looks scary but your reasons for making them this way make a lot of sense. Thanks for going to all the work of taking pictures and writing up directions.
Glad you love the dog tag still & use it!
Thanks for the tutorial! Looks simple enough!
Will you send me the PDF please? shootermcgruder@gmail.com
Thanks!
Thank you SO much for posting the information and photos! This is a life saver for me.
Please email the PDF to mojofar@gmail.com and I will forever be grateful for your work!
Thanks,
Jo-Anne
Post a Comment